
10 Essential Tools for 3D Printing
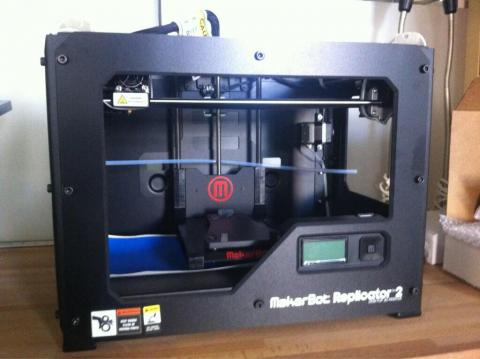
We've been playing with 3D printing for a while at Designalyze and have been using Parabox's Makerbot Replicator 2 for about a year and a half. We've learned a lot playing with these machines and have come up with a list of essential tools for getting the most out of your Makerbot. I'll specifically be talking about the Makerbot Replicator 2 which uses PLA and not ABS. However, most of the tools I'll discuss are applicable to most consumer 3D printers on the market. So let's take a look and the tools in no particular order. Full disclosure some of the links below are amazon affiliate links, so if you find these tools useful and purchase through this link you will also be supporting this blog. So thanks. Also if you cannot see the links below, it's probably because of ad block. Please whitelist this site.
First off lets talk about the Makerbot's build plate. It is made of clear acrylic and this can be good and bad. You will most like struggle to either get parts to adhere to the plate or to get them off the build plate. Depending on the type of part there are a couple of strategies and tools to employ to get the best results. If your part has a wide base on the build plate, or if you print with a raft support you will probably want to use some adhesive tape on the build plate. You have two options here and these are are first two tools:
#1 12" Wide Painter's Tape Sheets


#2 3" Wide Painter's Tape on a Roll


#3 Alcohol Wipes


These clean the surface a provide a lot of adhesion. As long as your build plate is level and your depth is adjusted correctly (more on that in a bit), this will prevent parts curling up. I will caution you that this may provide too much adhesion so if it's a big footprint part, use the tape.
If you have difficulty getting the part off the build plate, either with or without tape, I reccomend using the following tools:
#4 Scraper and Razor Blades


These two go hand in hand. You may not need the scraper, but it's good to have some razor blades on hand. You can use them for getting parts off the build plate, but they are also useful for cutting filament, trimming tape, cleaning parts, and about a million other things.
Once the part is out you may need to do a little clean up, especially if you printed with support. I usually don't like printing with support because the clean up can be a nightmare. To get all the support off if helps to have the next tool:
#5 Set of Files


PLA is a great part material but it makes a pretty lousy support material. Makerbot has improved it's support algorithms in Makerware, however, you will definitely still have trouble getting support off. A set of files is handy for cleaning up and extra support in tough to reach places of your parts.
Speaking of materials, you are going to need PLA for your printers and I've tried a few out there. There are cheaper version on-line, but in my experience the savings you might get from buying cheaper PLA is offset but the frustration you are going to have with it. So for the next one is:
#6 Makerbot PLA


There are three main reasons to pay a little more for the Makerbot PLA over cheaper alternatives.
- It is usually not tangled on the spool.
- It is not as brittle.
- It is of consistient in thickness.
The first one is critical. I've lost several prints because the spool was tangled. The filament would get caught and the extruder would not be able to pull the filament causing you to print air. Once this happens, your print is done. Other PLA I've tried has been very brittle. I once had to re-load the filament about 20 times on one print job because the filament kept snapping while it was being extruded. Never again with cheap filament. Other filaments I've tried have also had incredibly inconsistent thicknesses, which leads to jamming issues with the extruder, not fun.
Speaking of thickness (what a segue!), you will need to make adjustments to your machine everyonce in a while so the next two tools will help with that:
#7 Depth Gauge


#8 Digital Calipers


The depth gauge is critical for leveling the build plate. Especially if you have lost your Makerbot business card or it's bent or torn. You can also experiment with different depths and see how that affects adhesion on the build plate. The calipers are essential for designing parts and calibrating your machine. You can use it to check if your part thicknesses are correct and also take dimensions of objects while you are designing. I use mine all the time, and they are great addition to any toolbox.
Keeping your workspace and 3D printer tidy is extremely important. Pulling out parts and cleaning parts generates a lot of debris that can clog the mechanical components of the 3D printer as well as surrounding computers. You probably already have the next tool hanging around somewhere, but it a critical part of any office environment:
#9 Canned Air


And finally, if you have a Makerbot Replicator 2 you need to get the community designed Extruder Upgrade. You can print your own by downloading the files from thingaverse. You will also need the parts which you might be able to find at a hardware store or you can get them from the Makerbot Store.
#10 Extruder Upgrade
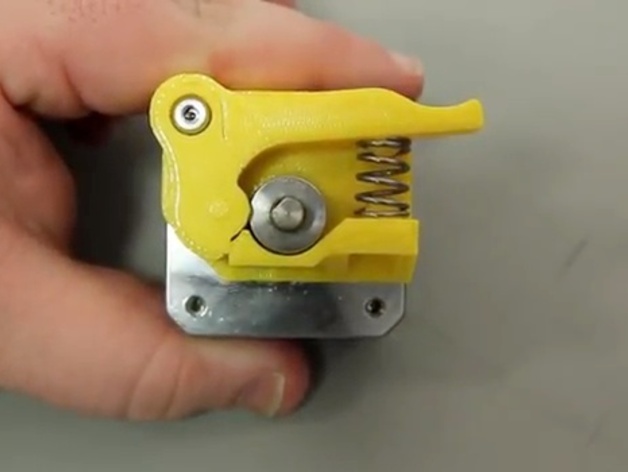
Here is a video describing how to install the upgrade.
BONUS TOOL: The Humble Paperclip
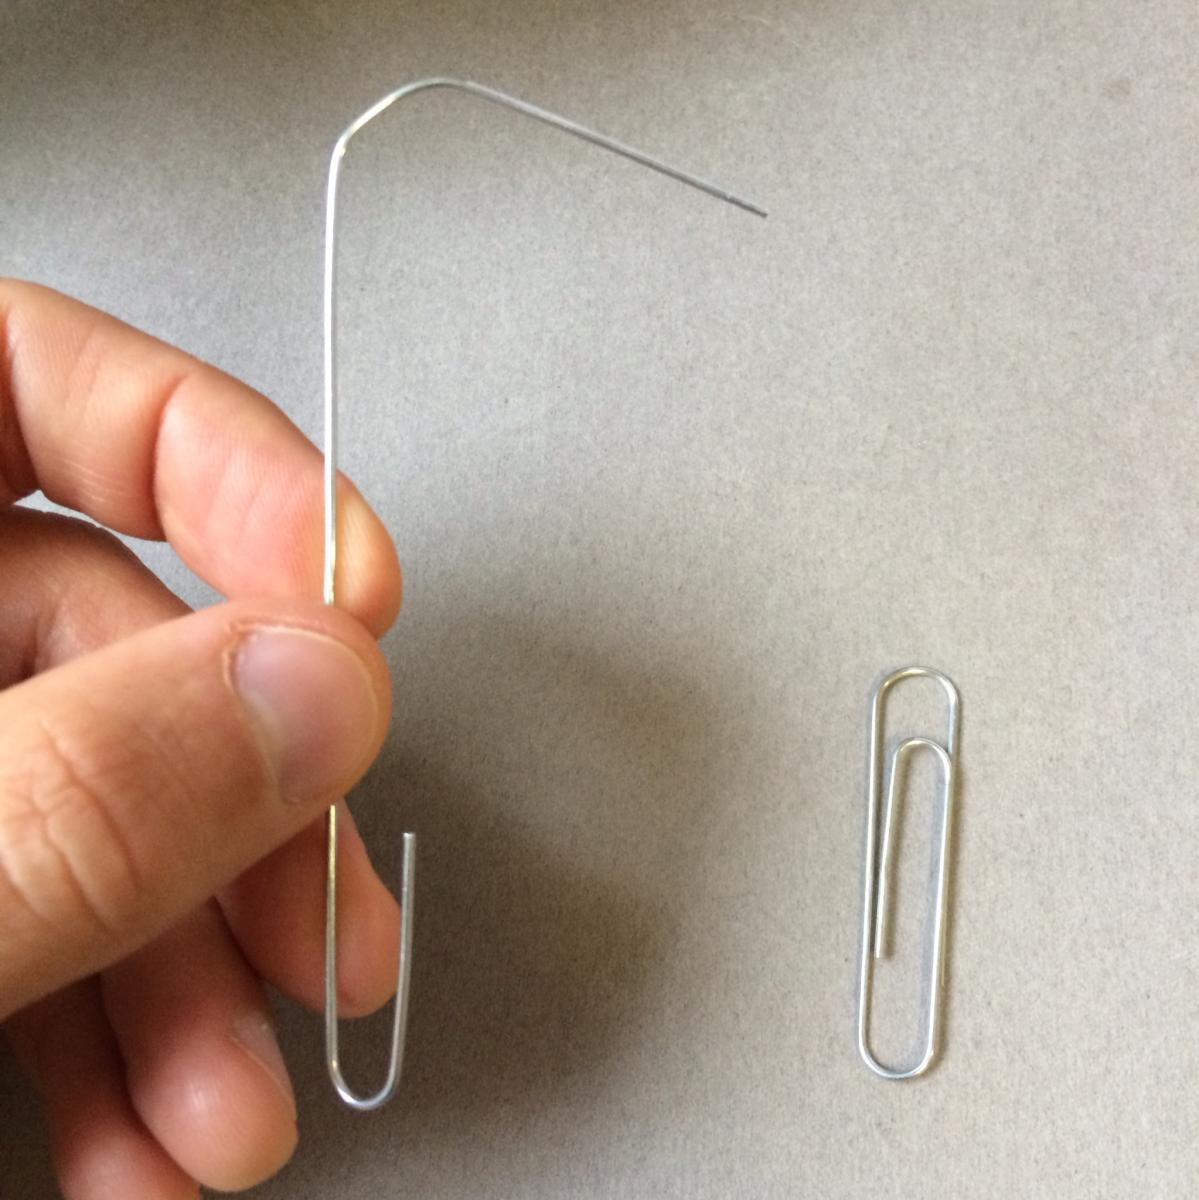
This is the classic OH SH*T key that used to recuse your CD-Rom drives. (How old am I?) Well the paperclip is handy for all sorts of things while 3D printing. I use it to grab stray filament while the printer is printing and a whole list of random things. Have a few on hand just in case.
Related Content


Want to Contribute?
Want to be an author? Drop us a line here we'd love to have you.
Already have a video you'd like to post? Send us a link and we'll get you going.
:)